I’ve decided to make my first pixelart tutorial. Long time ago (aprox. 3 years) I drew well. It’s out of perspective and it does not look not as good as it supposed to. Now I will try to correct some of the mistakes, showing you at the same time how to use reference capabilities of Inkscape and GIMP.
Tools we need:
- Inkscape – Free Open Source vector image editor – http://inkscape.org/
Available for various platforms: Linux, Windows, MacOS, etc…
- GIMP – Gnu Image Manipulation Program – http://gimp.org/
Also available for: Linux, Windows, MacOS, etc…
- Coffee, lots of coffee :) Some of you might use cigarettes instead coffee but it isn’t recommended
1. Analysis
Something is wrong with this well… Let’s try to describe potential mistakes:
- Incorrect perspective. The rounded part should be a circle flattened to 70% of height
- The top part with rope has a different perspective that the bottom part
- Strange shadow – it should rather fall behind – since we’ve got the sun form S-W at 45deg. angle
- Texture on the well is same as on the pavement
Well graphics is located on data/graphics/tiles/desert_x2.png. Let’s take a look.
As you can see we got 64x64px. This could be a potential problem. However we aim to not brake existing maps. So we ought use this space. Also to make our new well a bit more 3D’ish I’ve decided to make the rope part at a different angle.
2. Design
Now is the time for showing Inkscape’s vector capabilities.
File -> Document Properties
Width: 64px
Height: 64px
Now draw a circle 54x54px with 1px outline. And make direct TOP planar view of our well. You should have something similar to this:

Now let’s rotate our well. Angle? How about 30 degrees? You will see the purpose of this action later. Now we’ve got:

So what now? Now we select all, and change the units on the toolbar (from px to %), make sure that you have unlocked the aspect ratio (small lock between W and H values), and type 70% into H (height). Looks odd, don’t you think? But consider that this is how circles should look in the TMW’s perspective view.

Now is the time to show how we could make it to look like a 3D object. We simply have to duplicate the blacks rings, place them above and connect with lines. Operation is similar to the EXTRUDE operation used in the 3D editiors. The results of the operation:

Because of the space limitation we might have to reduce the height of the well, but now let’s concentrate on the wooden part with rope. Green rectangle stand for the outer box. Red squares are side pillars. Lets extrude them.

Zoom 400%. Take a look at this. Yellow shape with green bevels is our container for the wooden construction. Finally red pillars could be also thinner. If you are going to ask where will we put crank – notice we’ve got space on both sides of well. We could align our well to one side – doubling the space. So that is not a problem. So let’s concentrate now on the wooden construction. It has to be rounded. So we must put circle in correct perspective on either side part of container, and then simply connect nodes. Sounds easy.

Accomplished design should looks more less like the one on the bottom. Don’t forget to change the black outlines into gray – it allows us to recolour them much easier. Now we should export our well in scale 1:1. This is the end of the design phase. Time to pixel!

Final product of DESIGN PHASE:

3. Pixelart
Many people start from this step. Without doing the analysis, without the concept art and the design drawings/sketches. Of course they can. But I can’t. I like when the objects in the game are well pixelated, with the corect palette, perspective. That’s the reason why I showed you 2 previous steps. certainly, all of you have seen many pixelart tutorials. However I never seen someone who would design a base for a pixelart in Inkscape. At least you should try :)
Let’s look one more time on the old well and compare it to the new shape:

Do you see what I was talking about?
Next we will add some details to our design sketch.

Now, it is time for some textures.


Some other details, like wooden pillars:

wooden rope construction and some highlights:

Shading and some finishing touches on the brick surface:

Correct placing (I moved it to the left). Adding a crank and background, shadows and shadings. And it’s done:

All we need to do now is edit desert_x2.png. I see some minor mistakes – especially on the main well shadow, but it could be improved before committing into SVN.

I’ve decided to correct the shadow… Now is a bit better.

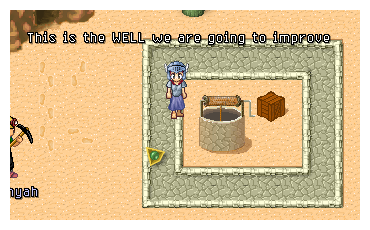
Now it’s done. Lets take a look how it now looks in game.

Now you can see that the cactus and the well are in the same perspective, the box is a bit off. Maybe next time we will draw some boxes!
Thanks for your patience. As you can see it isn’t as hard as it looks. I hope you’ve enjoyed this tutorial.
The end :)
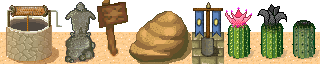
Or maybe not… :P Here is the version without the background.

Oh WELL…


